Understand acid/pH used to
Vocabulary: Insulation, conduction, writing, etching, lithography, soldering, schematic diagrams
Materials:
·
Radio Shack Copper plates (1 practice plate/1
plate used for FM PCB)
·
HCl or related acid for etching
·
Found products with known PCB inside (many can be
found in streets or second had stores. EXAMPLES:
CD players, mp3, calculator
·
Beakers that will fit 2in x 3in PCB
·
Camera
·
Acetone paper
·
Vacuum hood
·
Goggles,
·
Gloves
·
Apon
·
Iron
Procedure:
Engage/ Explore (Day 1)
Watch short 2 minute clip on discover.org, “how it’s made.”
(Abbreviated version of how printed circuit boards are made can be viewed
from this site.) After clip
has been viewed pass around PCB retrieved from found products and have students
guess what components they came from.
Students should contrast and compare in groups how pieces are inserted,
copper tracks are patterned, and one observation about any electronic component.
Explain (Day 1)
Students will go through a short sample of how negative imaging can be
transferred and fixed on PCB’s.
Students will use either a picture they have brought from home or a picture in
the class room. (If students have
brought a picture they must e-mail it to you or bring it on a flash drive in
order to be able to print image on acetone paper.)
Print each picture in black and white option on acetone paper.
Iron the transparency onto a copper board
Chemically etch the board using ferric chloride or hydro chloric acid.
(MAKE SURE ALL SAFETY EQUIPTMENT IS ON and PROCEDURE IS COMPLETED UNDER HOOD)

Extend (homework assignment)
Students must chose any electronic component that will be used for the FM
receiver radio (semiconductor, resistor, TDA receiver, trimmer potentiameter,
capacitor) and research how that
component is made and what it is used for.
Students must give 3 examples of products that use that specific product
besides FM radios)
Engage/Explore (Day 2)
Place all students name on board.
As students are walking into the classroom have each student write down next to
their name what electric component they studied the night before.
Group students in groups with unlike products and have each explain how
their piece functions examples of products it can be found in.
Students should use graphic sheet to draw and place description of each
members electric component that is described.
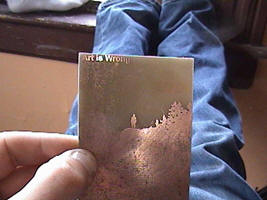
Students will be allowed to look at what they etched and wrote on copper plate
from day before. This is usually
very exciting because they will be able to keep a negative imprint of their
chosen picture and observe what areas kept the copper fixed to the bored and
which areas unsheathed the silicon.
Explore (Days 2 and 3)
Explain to students they will take the exact process that was completed the
prior day, but this time create an electronic schematic on their PCB that will
look very similar to the samples viewed the previous day.
Students will work in groups of two.
Remind the students of being patient while under the hood and careful
with laying the diagram. Remind
students if the diagram is not placed correctly on board their radio will be
unable to word. Using schematic
repeat procedures and steps used in day 1 negative imaging. (EXAMPLE BELOW)

Explain (Day 3)
Begin with students reflecting on what they thought
about the process of lithography.
Explain to students the next step will be to mark their PCB board and learn how
to solder and assemble electronic components.
Students will also learn how to use Dremel to drill or hand drill in
appropriate places.
Extend (homework assignment)
Have students make crossword puzzle using ALL electronic circuit vocabulary. Students will solve each others puzzles the following morning for a quiz. Students should use graphic organizer used on day 2 from sharing.
New York State Standards:
Physical Setting/Earth Science
Core Curriculum (Regents Earth Science)
Standard 1:
Analysis, Inquiry, and Design-Students
will use mathematical analysis, scientific inquiry, and engineering design, as
appropriate, to pose questions, seek answers, and develop solutions.
Standard 2:
Information Systems
– Students will access, generate, process, and transfer information, using
appropriate technologies
Standard 4:
The
Physical Setting/Earth Science (1.2g)
Standard 6:
Interconnectedness-Common Themes (Models) –
Models are simplified representations of objects,
structures, or systems used in analysis, explanation, interpretation, or design
Standard 7:
Interdisciplinary Problem Solving
The knowledge and skills of mathematics, science, and technology
are used together to make informed decisions and solve problems, especially
those relating to issues of science/technology/society, consumer decision
making, design, and inquiry into phenomena.